How to Make a PLANET
Step 1
Open Photoshop. Create new document 500×500 px: File -> New (or Ctrl+N). Fill with black colour.
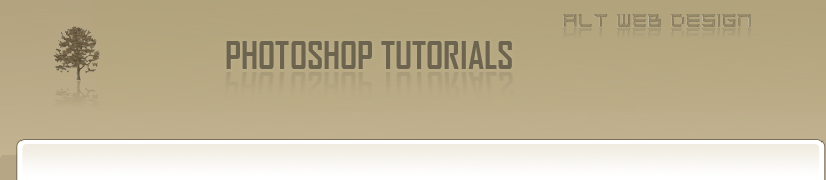
Create a new layer, call it ‘planet‘. Make a perfect circle using elliptical marquee tool. To retrieve the selection later, choose Select > Save Selection; name it ‘circle’ . Do not deselect.
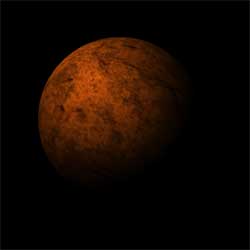
Select the Radial Gradient Tool (colors should be from brown #763D0A to black) and click and drag inside the selection.
Create a new layer, call it ‘planet‘. Make a perfect circle using elliptical marquee tool. To retrieve the selection later, choose Select > Save Selection; name it ‘circle’ . Do not deselect.
Select the Radial Gradient Tool (colors should be from brown #763D0A to black) and click and drag inside the selection.
Step 2
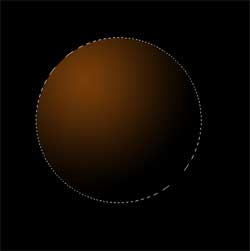
Get a nice stone texture. Open the texture up and go to Edit -> Define pattern.
Step 3
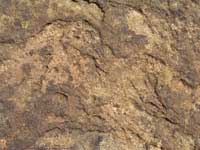
Go back to your planet image, create another layer and call it ‘texture‘.
Ctrl+click the thumbnail icon for the ‘planet‘ layer to load its selection.
Return to the ‘ texture‘ layer and fill the selection with your pattern: Edit -> Fill -> Pattern (or Shift+ F5). Deselect.
Ctrl+click the thumbnail icon for the ‘planet‘ layer to load its selection.
Return to the ‘ texture‘ layer and fill the selection with your pattern: Edit -> Fill -> Pattern (or Shift+ F5). Deselect.
Step 4
Load selection that you saved before by Select > Load Selection.
Apply Spherize Filter (Filter -> Distort -> Spherize). Put the amount to 100. Deselect.
Set blending mode to Overlay.
To eliminate a white outline in the shadow of your planet, load saved ‘circle’ selection.
Go to Select -> Modify -> Contract by 1 pixel. Select Inverse (Shift+Ctrl+I). Delete. Deselect.
Step 5
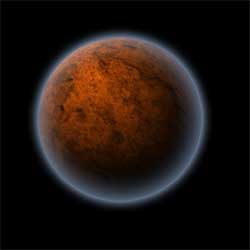
Duplicate your ‘planet‘ layer, call it ‘atmosphere‘. Set Fill Opacity to 0%.
Add a layer style:
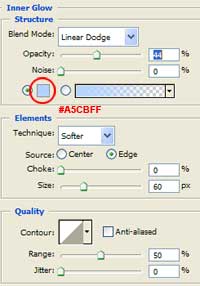
Add a layer style:
Outer Glow
Inner Glow
Step 6
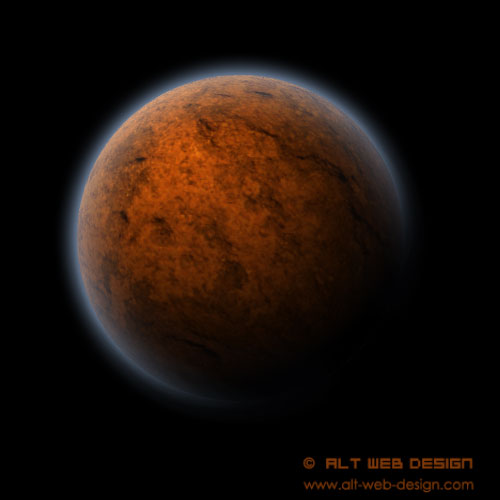
Create a new layer on the top. Merge it with ‘atmosphere‘ layer (Ctrl+E).
Set blending mode to Linear Dodge. Using big soft brush, erase a bit of atmosphere on the shady side of the planet.
Set blending mode to Linear Dodge. Using big soft brush, erase a bit of atmosphere on the shady side of the planet.
Ciekawa strona, tak trzymac , pozdrawiam
this is so cool!!!!!
y wil do a planet myself
i want to make a planet now
muito legal,mas qual photoshop é que devo usar?
This is awesome! :3
NAUČ SE VYJADŘOVAT!
thanks its good for when i am in computer class
awesome. making one now.